Introduction
Rin is a creative coding / game engine hybrid that aims to cover use cases where the structure of a game engine might not be the best solution but a traditional creative coding framework doesn't have the needed features.
Rin is based on Rust a systems language that provides elegant solutions to problems like error handling or memory management. Among other many features, Rust enums or iterators allow to implement certain designs in a much more concise way than in other languages and make certain tasks much easier and readable without compromising performance.
Creating a rin application
Once rust and rin are setup in your computer following the setup guide in the rin site you have a cargo rin extension that allows to create new projects with different features enabled.
First of all in a terminal create a folder somewhere in your computer to store all your rin projects.
Let's start from the most basic application possible.
From the previously created folder type:
cargo rin new basic_example
If you are using visual code you can directly type:
code basic_example
To open the new project. Or just open it from your favorite IDE.
The new project uses the default rin template. In it we can find two files, main.rs which contains the startup functions and we'll ignore by now and app.rs which contains the skeleton of our application:
use rin::gl;
use rin::prelude::*;
use rin::math::*;
use rin::window::Window;
use rin::graphics::arcball_camera;
use mutiny::{
    Scene, SceneBuilder, EventsDispatcher,
    postprocessing::Postprocessing,
    renderer::{ScreenRenderBufferBuilder, ForwardRenderer},
};

pub fn setup(window: Window, gl: gl::Renderer<'static>, events: EventsPoll) -> Scene {
    // Create the scene builder
    let mut scene_builder = SceneBuilder::new(events);

    // Add postprocessing bundle
    let postprocessing = postprocessing::Bundle::new();
    scene_builder.add_bundle(postprocessing);

    // Create a renderer using a render surface
    let renderer = ForwardRendererBuilder::new(gl, window)
        .with_render_surface()
        .samples(8)
        .separate_ambient_buffer()
        .build()
        .unwrap();

    // Create the scene
    let mut scene = scene_builder.with_renderer(renderer).build();

    // Add a camera to the scene
    let events_stream = scene.event_stream();
    let window_size = scene.viewport().size();
    let camera = arcball_camera::Builder::new(events_stream, window_size)
        .position(pnt3(0., 3., 3.))
        .look_at(Pnt3::origin())
        .build()
        .unwrap();
    scene.set_camera(camera);

    // Return the newly created scene
    scene
}
By default we get some basic code that we'll usually use in most projects. It creates a scene with a camera and a renderer, it also adds a postprocessing effects bundle which has most effects disabled but we can customize for our specific project.
Why two renderers?
As you can see in the empty template, the setup function receives a
gl::Rendererthat we then use to create aForwardRenderer. The first is just a little more than a wrapper to OpenGL's functions. TheForwardRendereris a more complex set of systems that render the geometries we add to the scene taking into account lights, cameras or the rin material system.ForwardRenderer's API is independent from any rendering backend although right now rin only supports OpenGL / WebGl.The setup function receives the
gl::Rendererinstead of theForwardRendererdirectly cause the gl renderer can be useful to create some resources that we might need before creating theForwardRendererbut also because we can use other types of render systems than aForwardRendererlike anImmediateRendereror perhaps a custom implementation.
Do we need postprocessing effects on every project?
Not really but rin's PBR material system uses linear colors by default so in order to render them properly we need to convert them back to SRGB which is done by the tone-mapping stage in the postprocessing effects. If you are going to use your own materials or in general materials that use no lighting like BasicMaterial you can probably remove postprocessing completely. Every other effect but tone-mapping comes disabled by default. For more information on postprocessing check the chapter dedicated to it.
To try the newly created project in the terminal we can type:
cargo run
Or use our IDE to run it.
Rin uses a data oriented approach where we add elements to a scene and rin renders them in the most optimal way posible.
To show this let's modify our setup function to add a cube to the scene that will be rendered when we run the application.
Adding geometry
First of all at the beginning of the file let's import the material builder for the StandardMaterial, the default PBR material in rin and for the color constants so we can easily specify the color of our material.
use rin::material::StandardMaterialBuilder;
use rin::color::consts::*;
Then after the code that adds the camera to the scene let's add a new geometry.
scene.set_camera(camera);

// Create a cube geometry and register it in the scene so we can use it later.
// as a return value we get it's entity id
let cube = scene.register_mesh(rin::graphics::cube(1.));

// Create a new material of with a red color
let material = scene.register_material(
    "RedMaterial",
    StandardMaterialBuilder::new().color(RED).build()
);

// Create a model using the previously created material and geometry at the origin
scene.add_model("Cube")
    .geometry(cube)
    .material(material)
    .transformation(pnt3!(0., 0.5, 0.))
    .build();
Two step registering of geometry and materials
You might have noticed that the geometry and the material are not directly added to our model instead we register them with the scene and then add them to the model. This allows to reuse the same geometry or material for more than one model. Rin's renderer can then make optimizations based on that. So if you want to draw more than one model with the same geometry or material remember to reuse them instead of creating new ones every time.
If we run our application now we'll still see nothing. That's because we are still missing a light that lights the scene and allows us to see the cube that we just added. Let's do that.
Adding a ligt to the scene
First of all let's import Node the type used to specify transformations in rin. Again at the beginning of the file:
use rin::graphics::Node
Then, right after the previous code, after adding the cube:
// Create a directional light
let light_lookat = Node::new_look_at(
    pnt3!(3., 3., 3.),
    pnt3!(0.),
    Vec3::y()
).unwrap();
scene.add_directional_light("Sun")
    .transformation(light_lookat)
    .build();
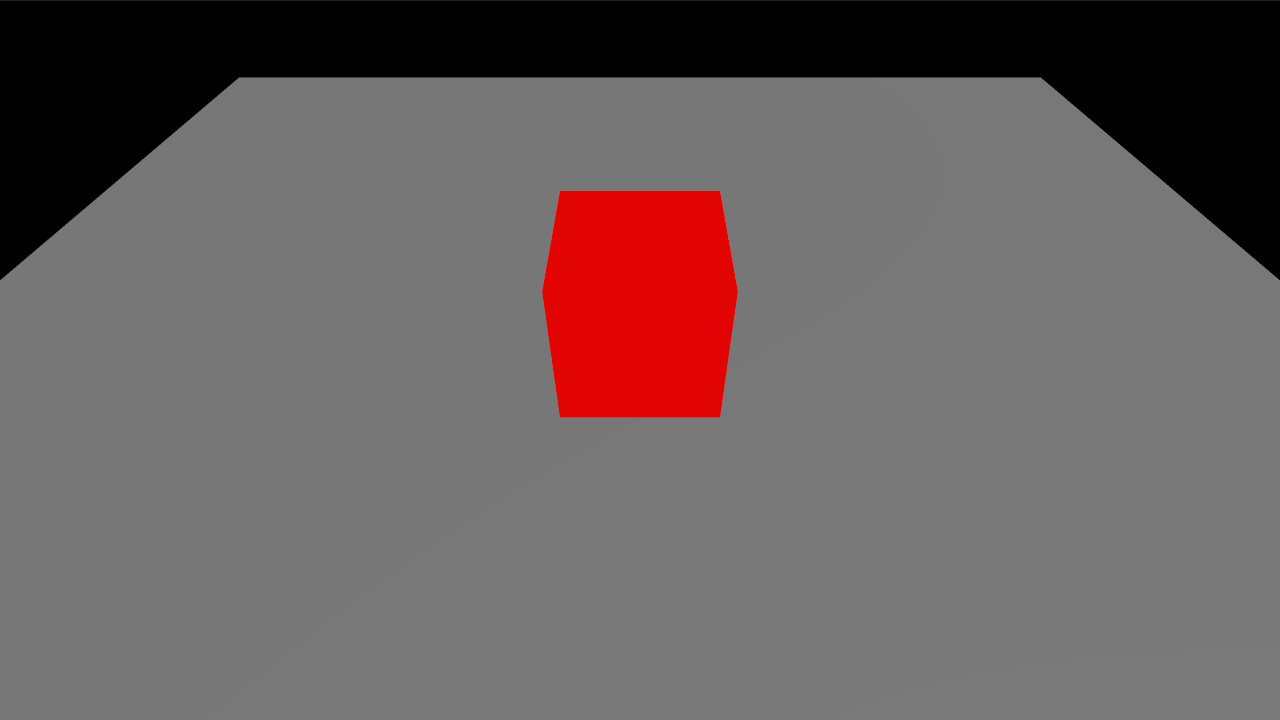
This creates a light at 3,3,3 looking at 0,0,0 with an up vector of positive y. If we run the application now the cube appears in the middle of the screen. The camera that the default template adds by default is an interactive arcball camera that can be moved using the mouse.
Different types in transformation
The transformation methods for the model and the light accept different parameters. In the first case we passed a three dimensional point to specify the origin, for the light we used a
Nodeto specify a more complex transformation that positions the light but also makes it look at a certain point. The transformation method of the different entities that can be added to the scene usually accepts anything that can be converted into a Node, like aPnt3, aTranslation3, aUnitQuat(a quaternion) or aNode.
Our cube looks really flat cause our lighting doesn't have shadows yet also there's only a directional light but no ambient light which makes it look completely dark on the sides where there's no light. Let's solve these two issues.
Enabling shadows
Before adding shadows let's add a second geometry for the ground so we can actually see any shadows. After adding the cube lets create a plane for the ground:
// Create a new material of with a gray color
let gray_material = scene.register_material(
    "GrayMaterial",
    StandardMaterialBuilder::default().color(GRAY).build()
);

// Create a model using the previously created material and geometry at the origin
let plane = scene.register_mesh(rin::graphics::plane(vec2!(10.), 1, 1));

// Create a quaternion to rotate the ground plane around it's x axis -90 degrees since it's
// by default oriented towards z
let ground_rotation = UnitQuat::from_axis_angle(
    &Vec3::x_axis(),
    -90f32.to_radians()
);

// Create the ground model
scene.add_model("Ground")
    .geometry(plane)
    .material(gray_material)
    .transformation(ground_rotation)
    .build();
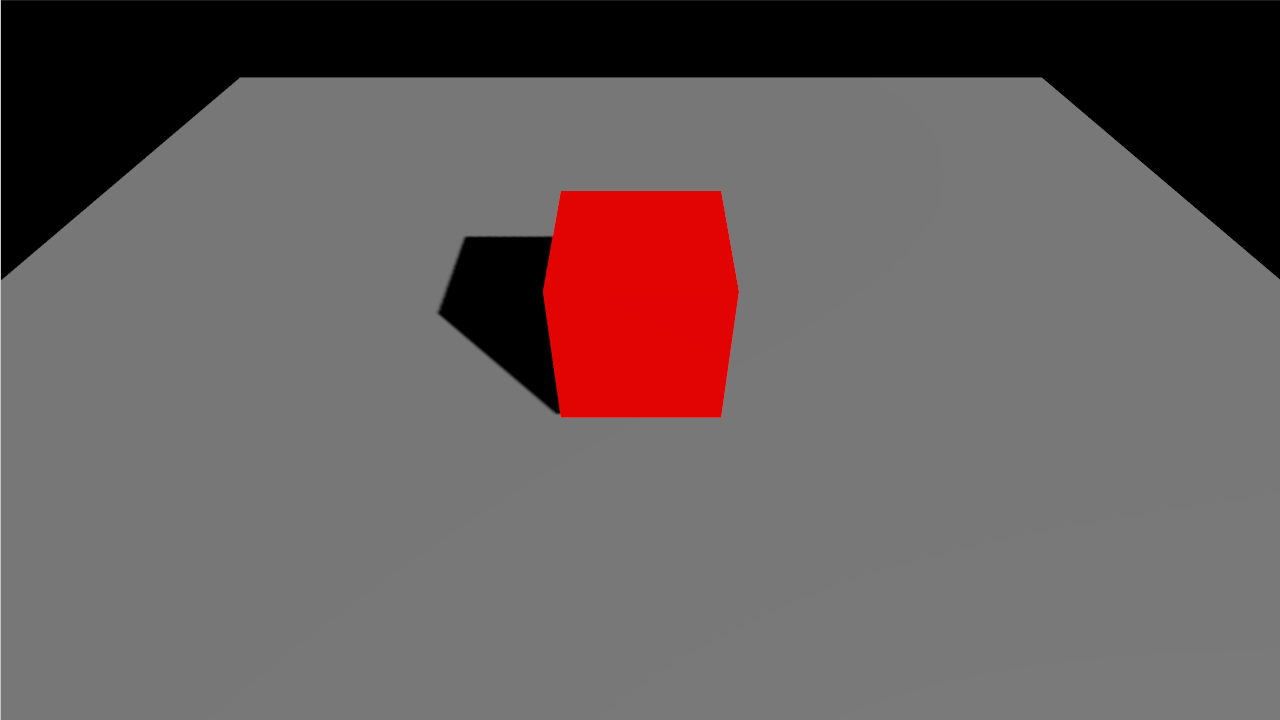
In order to add shadows let's modify the creation of the light and add a shadow map to it:
// Create a directional light
let light_lookat = Node::new_look_at(
    pnt3!(3., 3., 3.),
    pnt3!(0.),
    Vec3::y()
).unwrap();
let shadow_parameters = rin::scene::light::shadow::Parameters{
    map_size: 1024,
    resolution: rin::scene::light::shadow::Resolution::_32,
    left: -4.,
    right: 4.,
    top: 4.,
    bottom: -4.,
    near_clip: 1.,
    far_clip: 10.,
    bias: 0.004,
    depth_clamp: true,
};
scene.add_directional_light("Sun")
    .transformation(light_lookat)
    .shadow_map(shadow_parameters)
    .build();
Entities names
When we create most entities we add a name to them, this allows to easily debug some things when we have complex applications with lots of entities in them since it allows us to see which entity we are debugging, search for them by name or use addons like rin inspector to see all the entities present in the scene with their names
Adding an image based light
In order to make the lighting more appealing a technique that is frequently use is using a HDR environment map to act as lighting so the light is tinted with the colors from the objects in the environment map instead of just having a flat color, this can add more realism to a scene but also can be used for different effects.
Rin provides tools to adapt HDR maps in different formats to the format that it needs to be used in real time. By now let's just download one from the examples repository: https:/rin.rs/examples/envmap.zip. Download it and uncompress it's contents in an assets folder inside the project.
Then we can create an image based light in the scene using this environment map. After the creation of the directional light add:
scene.add_image_based_light("ibl")
    .from_equirectangular("assets/irradiance.hdr", &[
        "assets/radiance_0.hdr",
        "assets/radiance_1.hdr",
        "assets/radiance_2.hdr",
        "assets/radiance_3.hdr",
        "assets/radiance_4.hdr",
        "assets/radiance_5.hdr",
        "assets/radiance_6.hdr",
        "assets/radiance_7.hdr",
        "assets/radiance_8.hdr",
        "assets/radiance_9.hdr",
        "assets/radiance_10.hdr",
    ]).unwrap();
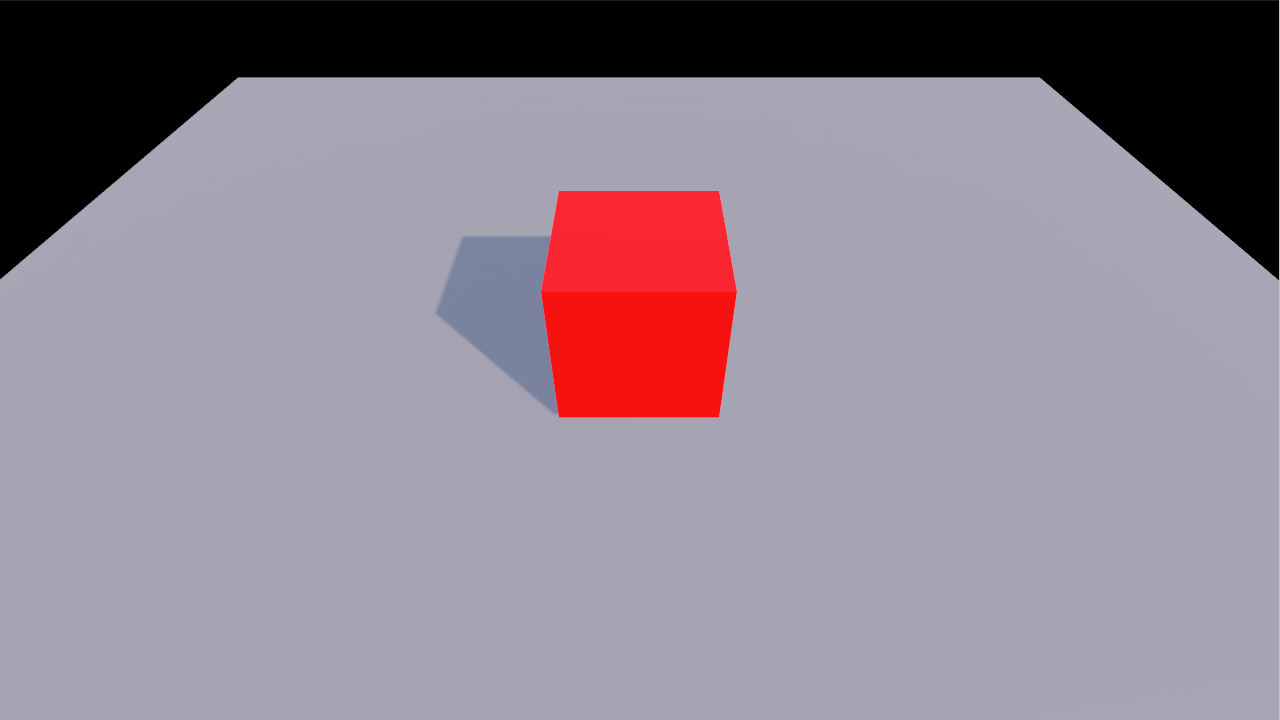
Now the lighting is much softer with the sides of the cube that are not directly facing the directional light also illuminated and the blue from the sky tinting slightly the ground.
Finally, our directional light is created by default with a pure white color which might look strange mixed with the more reddish color of the environment map. To change the color of the light we can add a parameter to the builder calls and pass a color. Although we could just use a color constant or an Rgb value we'll use the blackbody function to calculate the color of the light based on it's color temperature in kelvin degrees. Let's use 3500K which is pretty similar to the lighting in the environment map.
scene.add_directional_light("Sun")
    .transformation(light_lookat)
    .shadow_map(shadow_parameter)
    .color(rin::scene::light::blackbody(3500.))
    .build();
Builder pattern
If you are new to rust you might find strange the pattern rin uses to create the different entities, the camera or the renderer. It's known as builder pattern, it allows to build something that potentially needs lots of options without having to use a constructor method with lots of parameters. Instead we first create a builder, either directly like in the case of the camera with
arcball_camera::Builder::new()or through the scene like in the case of the lights with scene.add_directional_light("Sun"). Those calls return a builder to which we then call chained methods with different options that we want to change from whatever is the default. When we are done configuring we call.build()which will finish creating the object and in the case of builders returned from the scene, add them to the scene.Some builders receive parameters in their construction, like the name for most entities or the gl renderer and the window for the
ForwardRenderer. Those parameters are the minimum, mandatory, ones that the object we are building needs to work.
Adding movement
Let's not move the cube in the scene.
Rin uses a data oriented paradigm called Entity Component System (ECS). Understanding this model is relatively simple but a bit different to the way you might be used to do things if you come from object oriented programming or other paradigms.
As it's obvious from its name, an ECS application is composed by entities, components and systems.
When in the previous example we added the cube, the ground or the lights, those are entities. Entities, really are nothing but an id, a number that identifies each of this elements. When we added the cube in the first example we could have stored is entity:
let cube = scene.add_model("Cube")
    .geometry(cube)
    .material(material)
    .transformation(pnt3!(0., 0.5, 0.))
    .build();
The variable cube is the entity, the id that represents the cube we just added. It doesn't have any methods or any data. We can't do cube.materialor anything similar cause the entity doesn't really contain the material or the geometry or even the transformation.
Instead that data is stored as components, the C in ECS. Each entity has associated components. In the case of our cube, it has a geometry, a material and a transformation. Those components live in separate storages and can be accessed independently as we'll see next.
Adding custom components
So let's see how to move our cube. As we've said before entities components can be accessed independently which means that usually we won't be moving our cube alone but everything that has a certain set of types of data which means that those entities have to be moved. For example in order to move something it usually will need to have a velocity and a position. So we can create two components, one for position and one for velocity and then move everything that has those two things.
We already have a position in the cube transformation. And indeed other entities like the ground also have a transformation. Since we only want to move the cube we'll only add a velocity to that entity and then create a system that moves everything that has a velocity and a transformation.
In order to add a velocity let's create a new component of type Velocity and add it to our cube.
At the beginning of our app.rs, right below all the imports, all the lines at the beginning that start with use ..., lets add a new struct of type Velocity with a Vec2 in it that will mean the three dimensional velocity an entity has:
use serde_derive::{Serialize, Deserialize};
use rin::ecs::Component;

#[derive(Component, Debug, Serialize, Deserialize)]
struct Velocity(Vec3);
Now we can use Velocity as a component. Let's add it to our cube. In the lines where we created the cube let's add a new one with it's velocity:
let cube = scene.add_model("Cube")
    .geometry(cube)
    .material(material)
    .transformation(pnt3!(0., 0.5, 0.))
    .add(Velocity(vec3(1., 0., 0.)))
    .build();
By itself, velocity doesn't do anything, we now need code that interprets this new data and moves any entity that has a velocity and a transformation. To do that we'll need the final part in ECS the S, systems.
Systems or how to add movement
First of all let's import some types we'll need. At the beginning of the file where we imported rin::ecs::Component let's change that line with:
use rin::ecs::{Component, Write, Read, system_foreach, Res};
use rin::scene::time::Clock;
And finally at the end of our app.rs file below the setup function let's add a new function:
#[system_foreach(name = "movement")]
fn movement(node: Write<Node>, velocity: Read<Velocity>, clock: Res<Clock>) {
    let delta = clock.game_time_delta().as_seconds();
    let translation = velocity.0 * delta as f32;
    node.translate(&translation);
}
This is a system that gets the time in seconds for the last frame, multiplies it by the object velocity and applies this as an increment to its position. This happens for every entity that has both a Node and a Velocity that entity might, and surely will, have more components but this system only cares about those two.
Now the system won't run by itself we need to tell the scene to run it every frame. In order to do that we'll add a new line anywhere in setup. Systems can be added to the scene builder or to the scene cause sometimes their creation need a full scene although most of the time the scene builder is fine so let's do that:
scene_builder.add_system(movement);
Now if we run our application it'll show the cube moving.
Immediate renderer
Although the most common way of using rin is through the scene graph like model we've just seen in the two previous chapters, where we add entities to the scene and they are automatically rendered in the most efficient way, sometimes that model might result cumbersome.
If we only want to draw some lines, text, render a full quad with a custom shader or similar the scene model, more thought to be used with 3D geometry, lights... is not ideal.
Because of that rin also provides an immediate mode that is sometimes easier or simply more adequate for certain tasks. This two modes can even be mixed so if we start an application in immediate mode but later on we realize we want to have a scene graph like application, it's easy to convert one into the other. Or if we are working on a 3D application but we want to simply show some debug view on top or add some gui elements we can add an immediate renderer system.
In this chapter we are going to see only how to use a standalone immediate renderer.
To create an immediate mode application we can use cargo-rin:
cargo rin new immediate_renderer --immediate
Which will create a new project in a folder called immediate_renderer using the immediate template.
As you can see the initial code for an immediate mode application is somehow simpler than for a scene graph like one but the layout is pretty similar:
use rin::{ecs::{EntitiesThreadLocal, ResourcesThreadLocal}, gl};
use rin::prelude::*;
use rin::math::*;
use rin::window::{Window, EventsPoll};
use rin::scene::{
    Scene, SceneBuilder,
    ImmediateRenderer,
};

pub fn setup(window: Window, gl: gl::Renderer<'static>, events: EventsPoll) -> Scene {
    // Create the scene builder
    let mut scene_builder = SceneBuilder::new(events);

    // Create a renderer using a render surface
    let renderer = ImmediateRenderer{
        window,
        renderer: gl,
        system: render_system,
    };

    // Create the scene
    let mut scene = scene_builder.with_renderer(renderer).build();

    // Return the newly created scene
    scene
}

fn render_system(
    gl: &gl::Renderer,
    viewport: Rect<i32>,
    entities: EntitiesThreadLocal,
    resources: ResourcesThreadLocal
){

}
In the setup function it creates an ImmediateRenderer using the render_system function. The render_system function is a special function that acts as a system but apart from the entities and resources parameters that receives any other system, it receives a gl::Renderer that we can use to draw to the window, and the viewport.
Using the ImmediateRenderer it creates the scene and returns it as in previous examples but there's no camera since all the view setup is in this case done manually from the render_system.
Before adding any code, let's import the color constants that we are going to use later, after the last use at the top of the file let's add:
use rin::color::consts::*;
Let's start by drawing a circle. Inside the render_system function let's add:
let half_screen = convert(pnt2(viewport.width, viewport.height) / 2);
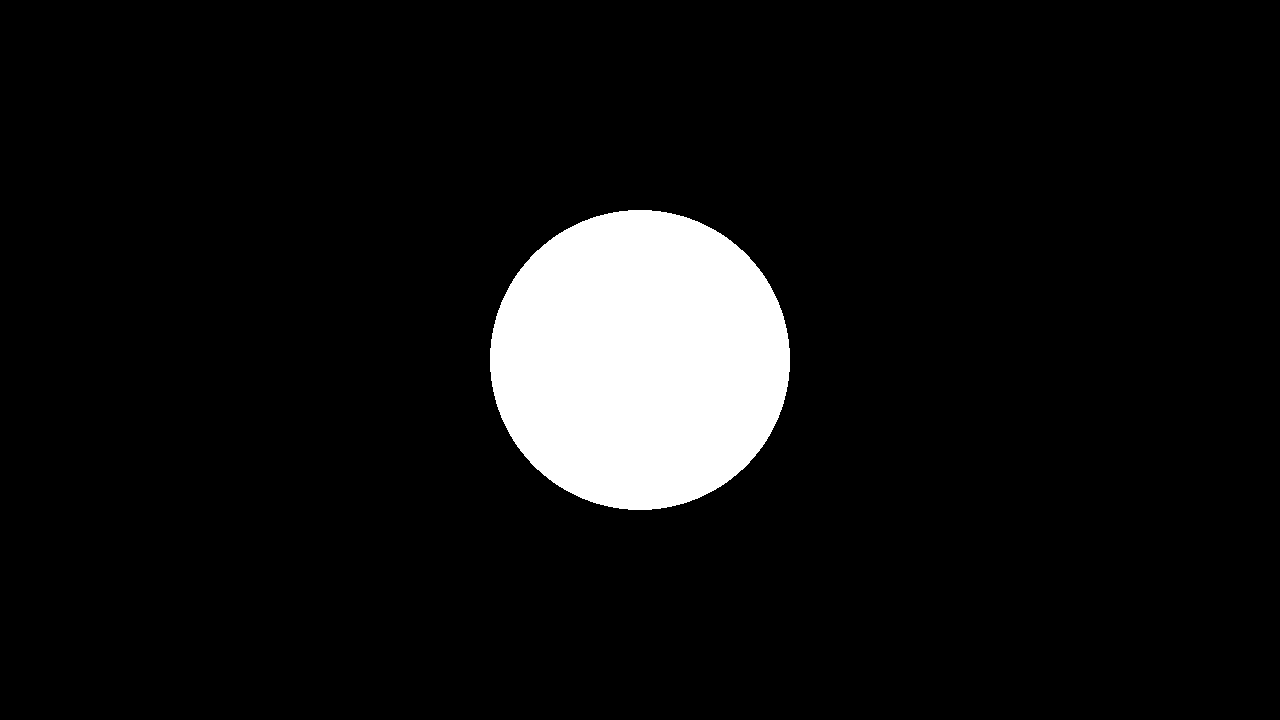
gl.draw_circle_fill(&half_screen, 150., 200, &WHITE);
If you are using rust-analyzer on visual code or any other editor that supports it, it'll show what each of the parameters are but in any case with the draw_circle_fill function we are drawing a filled circle at the passed position, in the middle of the screen, with radius 150. and resolution 200 in white color.
To calculate the middle of the screen we just divide the viewport size by 2 and use convert to convert the integer Vec2 to a float one which is what the draw_circle_fill function expects.
Running the application using cargo run will show a black screen with a white circle in the middle.
Strict number types
If you had no previous experience with rust you might have noticed by now that the number type system is pretty strict. When dividing the viewport size point by 2, that 2 needs to be an integer, if we used a float, by adding a dot after the 2, the compiler would fail. We then need to convert the Pnt2 to a float point since thats what the circle drawing function expects and the draw circle function admits a float radius and an integer resolution, which makes sense since the radius isn't necessarily an integer but the resolution doesn't make sense as a float since it's the number of segments we use to draw the circle. If any of this types is wrong the compiler would fail with a message letting us know about the issue.
This strictness avoids a lot of problems that are difficult to debug by showing errors at compile time and although it might be cumbersome at the beginning it's easy to get used to, mostly since rust-analyzer shows use the problems in the editor itself without even needing to compile the application.
Drawing several circles
Let's now draw several circles. For that let's use the rand crate that allows us to generate random numbers. Inside the immediate project folder, from the terminal, let's type:
cargo add rand
Next let's create a few circles in different positions. In order to do that we'll need to store the positions of the circles in some place. As we did in the previous example we can create a Position component and create entities in the scene that we can then read from the renderer to draw circles at the position of each entity.
First of all let's create the Position component. Before the setup function let's add:
use serde_derive::{Serialize, Deserialize};
use rin::ecs::{Read, Write, Component};

#[derive(Clone, Copy, Debug, Serialize, Deserialize, Component)]
struct Position(Pnt2);
derive
The derive annotation above our component makes the component implement certain traits, the
Componenttrait is a rin trait that allows the struct to be used as a component as we'll see in a moment. From the rest,Clone,Copy, andDebugare pretty obvious by their name and are standard rust traits that don't really need to be derived but are useful to have. You can look more documentation for them in the official rust docs.
SerializeandDeserializeallow a type to be turned into several formats for storage and right now are required by rin whenever we want to use a type as a component. These traits come from the serde crate.
Now let's use the Position component to create 100 entities that will show as circles at random positions, in setup, after creating the scene:
    let viewport = scene.viewport();
    let w = viewport.width as f32;
    let h = viewport.height as f32;

    for _ in 0..100 {
        scene.new_entity()
            .add(Position(pnt2(rand::random::<f32>() * w, rand::random::<f32>() * h)))
            .build();
    }
And finally in the render system, let's remove the code we previously added and change it with:
    for pos in entities.iter_for::<Read<Position>>() {
        gl.draw_circle_fill(pos, 20., 30, &WHITE)
    }
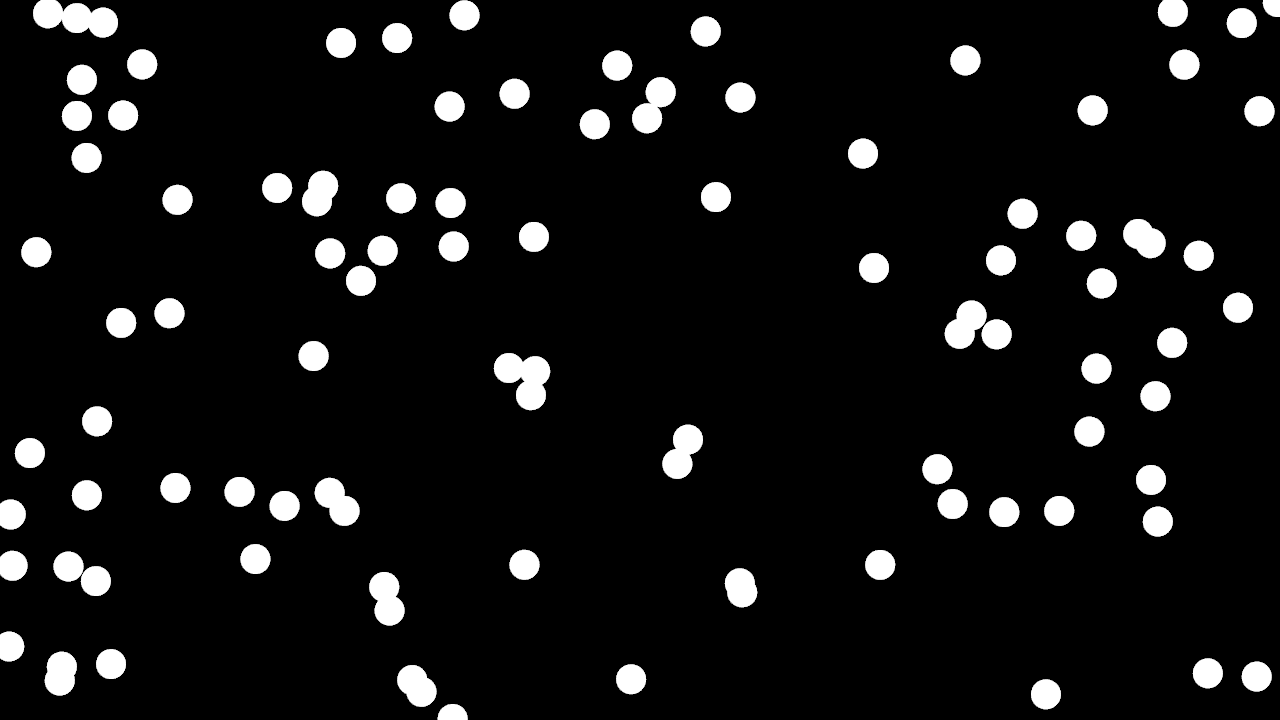
Running the application with cargo run will now show 100 small circles randomly distributed in the screen.
Varying sizes
All the circles now have the same radius, 20. since that's what we use to draw then in the render system. What if we wanted to draw them with different radiuses?
For that we could create one more component, Size, that let's the renderer know which size to render each circle at.
Let's first of all create that component. For that after the Position component, let's add:
#[derive(Clone, Copy, Debug, Serialize, Deserialize, Component)]
struct Size(f32);
Now for each entity let's create a Size, in setup, inside the for loop let's add a Size after adding the position. The resulting code ends up like:
    for _ in 0..100 {
        scene.new_entity()
            .add(Position(pnt2(rand::random::<f32>() * w, rand::random::<f32>() * h)))
            .add(Size(rand::random::<f32>() * 90. + 10.))
            .build();
    }
Which creates a random size for each entity, between 10 and 100.
Now let's read the size from the renderer and use it as the radius. For that we need to change our for loop to not only retrieve the Position component but also the Size and then use both to draw the circles:
    for (pos, size) in entities.iter_for::<(Read<Position>, Read<Size>)>() {
        gl.draw_circle_fill(pos, size.0 / 2., 30, &WHITE)
    }
size.0
The way we use the size by accessing the f32 number inside the struct using .0 might seem strange if you don't have experience with Rust. Since we are using a struct which fields have no name the way we access those fields is by using their position number starting at 0. If the Component had more than one field they would be accessed with .1, .2 ...
Why don't we need it for the position then? We could do the same by doing
&pos.0instead of simply passingposbut rin implementsstd::ops::Derefautomatically for every Component with only one unnamed field so passing a reference to a Position works the same as passing a reference to it's only member. This won't work for arithmetic operations like we do withSizebut can be used in many other cases like calling methods of the unique unnamed member or passing references like we just did withpos.
Note how we use a tuple, several elements in between parenthesis, when specifying more than one type of component. Both on the iter_for and the resulting variables. This is needed and trying to retrieve more than one component type without a tuple will fail.
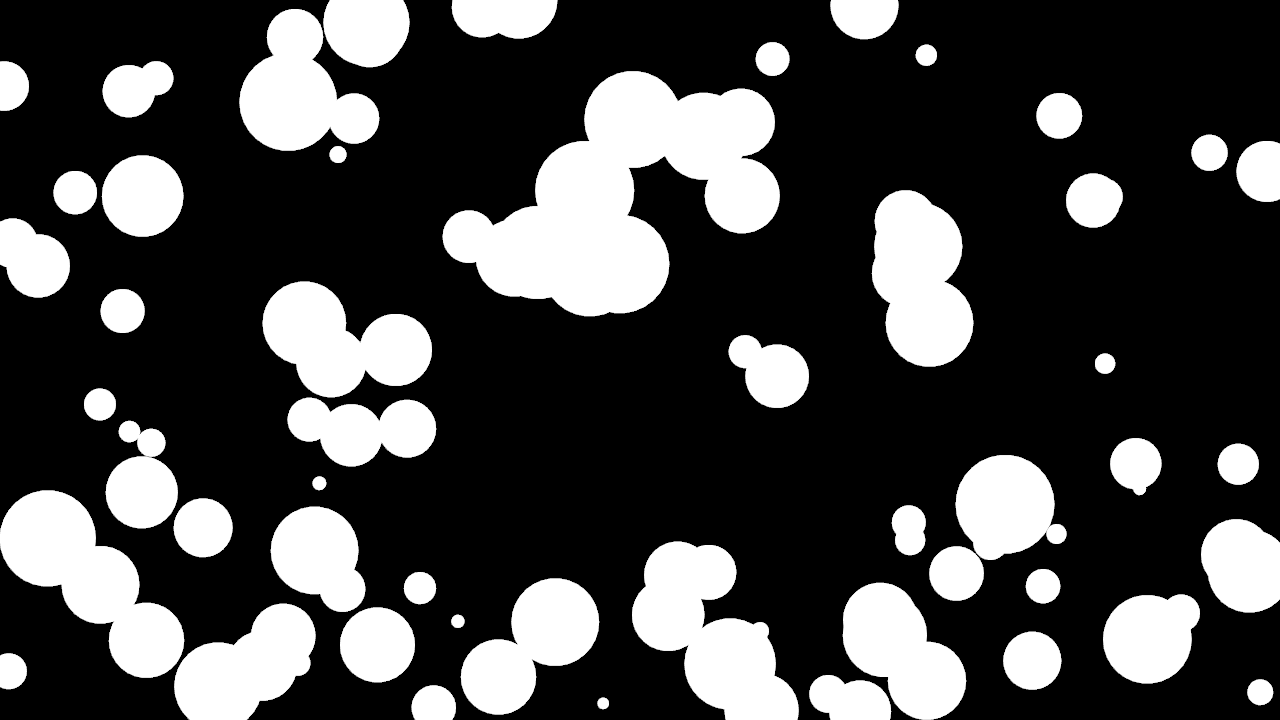
If we run the application again with cargo run will see several circles distributed randomly but now of different sizes. We could even use the size to change the resolution instead of using a fixed 30 but 30 looks good for the size range we are using so let's leave it as it is.
Adding movement
Let's now add movement to the circles. For that we'll need one last component, Velocity. Again let's create it at the top of the file after Size:
#[derive(Clone, Copy, Debug, Serialize, Deserialize, Component)]
struct Velocity(Vec2);
Let's now add a Velocity to each entity. Again in setup, inside the same for loop where we are already creating the entities with Position and Size, let's add a random Velocity for each. The resulting loop looks like:
    for _ in 0..100 {
        scene.new_entity()
            .add(Position(pnt2(rand::random::<f32>() * w, rand::random::<f32>() * h)))
            .add(Size(rand::random::<f32>() * 90. + 10.))
            .add(Velocity(vec2(rand::random::<f32>() * 20. - 10., rand::random::<f32>() * 20. - 10.)))
            .build();
    }
Of course if we tried to run the application now, nothing would change. The new Velocity component is just a piece of data that won't change anything until we use it from a system. In order to do that let's create a new function before the render system:
fn update_position(clock: &Clock, entities: Entities, resources: Resources) {
    let delta = clock.game_time_delta().as_seconds() as f32;
    for (pos, vel) in entities.iter_for::<(Write<Position>, Read<Velocity>)>() {
        pos.0 += vel.0 * delta;
    }
}
And in order for this function to run let's add the system to the scene. After creating the scene_builder let's add:
scene_builder.add_update_system(update_position);
If we run the application now, we'll see that the circles move, but leave a trail, that's cause in rin when using an immediate renderer, we need to clear the screen manually. In the render system let's add right before the for loop:
gl.clear(&BLACK);
Which clears the screen with black on every frame before drawing the circles. Now running the application will show the circles moving in the screen.
If we left the app running long enough, all the circles would disappear from the screen. What if we wanted to make them rebound against the edges of the screen? To do that we could check if the position of the circle after adding the velocity is outside of the screen and in that case reverse the velocity so next frame the circle would move in the opposite direction.
To do that we need access the the viewport from the update system. The viewport is stored by rin as a resource and can be accessed as some other resources that can be checked in the documentation in the following form.
First of all let's import the correct Viewport type:
use rin::scene::transformation::Viewport;
If you use rust-analyzer automatic import on autocompletion be sure to not import other Viewport like the one on gl. Now on update let's retrieve the viewport from resources and use it to make the circles rebound, the final system looks like:
fn update_position(clock: &Clock, entities: Entities, resources: Resources) {
    let viewport = resources.get::<Viewport>().unwrap();
    let delta = clock.game_time_delta().as_seconds() as f32;
    for (pos, vel) in entities.iter_for::<(Write<Position>, Write<Velocity>)>() {
        pos.0 += vel.0 * delta;
        if pos.x < 0. || pos.x > viewport.width as f32 {
            vel.x = -vel.x
        }
        if pos.y < 0. || pos.y > viewport.height as f32 {
            vel.y = -vel.y
        }
    }
}
Note how we had to change the access operator for Velocity from Read to Write since we now need to modify it and how we can access the velocity and position components x and y directly without doing pos.0.x, although we could do that too, because of the automatic Deref implementation for simple wrapper components.
Now the circles bounce when they arrive at the borders of the screen. The rebound doesn't happen at the edge of the circles but at their center and one frame later but we'll leave that as an exercise for the reader.
Adding colors
Let's quickly add different colors per circle. The idea is the same as until now. We create a Color component, add a random color per entity and use it when drawing.
The imports:
use rin::color::{Rgb, Rgba, rgb, rgba};
The component:
#[derive(Clone, Copy, Debug, Serialize, Deserialize, Component)]
struct Color(Rgb<f32>);
The setup:
    for _ in 0..100 {
        scene.new_entity()
            .add(Position(pnt2(rand::random::<f32>() * w, rand::random::<f32>() * h)))
            .add(Size(rand::random::<f32>() * 90. + 10.))
            .add(Velocity(vec2(rand::random::<f32>() * 20. - 10., rand::random::<f32>() * 20. - 10.)))
            .add(Color(rgb!(rand::random(), rand::random(), rand::random())))
            .build();
    }
And the render:
    gl.clear(&BLACK);
    let iter = entities.iter_for::<(
        Read<Position>,
        Read<Size>,
        Read<Color>
    )>();
    for (pos, size, color) in iter {
        gl.draw_circle_fill(pos, size.0 / 2., 30, &color.0)
    }
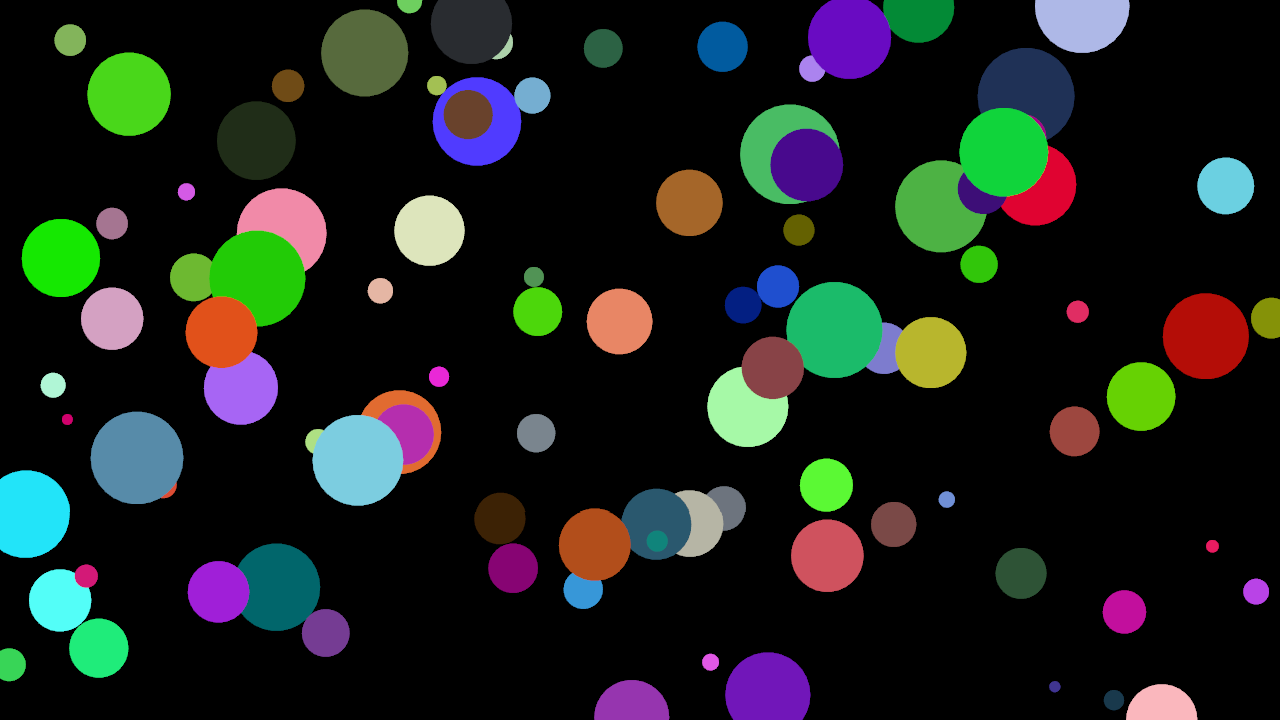
Some notes
When adding the color to the entity we haven't specified the type of the random number to be an f32 as we've done before. That's because in this case the parameter to the Rgb type constructor are f32 so rust can directly guess the type. That's usually the most common but in the previous examples we where doing arithmetic operations with the result from
rand::random()which stopped rust from being able to guess the type.When adding the new type to the iterator for drawing the resulting line was too long so we separate the iterator and the for loop in two lines for readability.
When passing the color to
gl.draw_circle_fillwe need to explicitly specify&color.0and can't just pass color as we did with pos. This is because the gl.draw_circle_fill function is generic over the type of color it accepts so it can take an Rgb of any number type but also a constant like WHITE or another color type. Rust has a limitation for which generic parameters like this can be guessed from a type that implements aDerefso we need to specify&color.0to directly pass a type that implements ToRgba, theRgb<f32>insideColor.
Alpha blending
In order to show how to change the gl state let's change the circles to have some alpha. First of all let's change the color from Rgb to Rgba:
#[derive(Clone, Copy, Debug, Serialize, Deserialize, Component)]
struct Color(Rgba<f32>);
Then in setup, let's change the rgb calls to rgba and let's use an extra parameter 0.5 for the alpha.
.add(Color(rgba!(rand::random(), rand::random(), rand::random(), 0.5)))
Finally before rendering we'll need to enable alpha blending in the gl renderer, in the render_system function after clearing and before drawing we create a copy of the renderer but adding new properties:
    gl.clear(&BLACK);

    let gl = gl.with_properties(&[
        gl::Property::Blend(true),
        gl::Property::BlendFunc(gl::ONE, gl::ONE_MINUS_SRC_ALPHA),
    ]);
    let iter = entities.iter_for::<(
        Read<Position>,
        Read<Size>,
        Read<Color>
    )>();
    for (pos, size, color) in iter {
        gl.draw_circle_fill(pos, size.0 / 2., 30, &color.0)
    }
Everything rendered with the new renderer will have blending enabled. We use the same name gl, cause we don't need the old one anymore but we could use a different name if we wanted to reuse the original renderer or use a block to scope the copy with blending.
The state of the new renderer is set only once and even if we would alternate between using one and the other the state changes would be the minimum possible required since tin internally tracks the state and only changes whatever it needs to set the state of the renderer we are drawing with making it much easier to use than the traditional push/pop architectures while being as fast or more since the state changes done are reduced to a minimum.

GUI
One of most distinctive paradigms behind rin is that although it's main entry point, the way it's mostly used, is through code, the gui is a first class citizen. Let's compile the previous example, immediate_renderer in the examples repository but in this case let's enable the gui.
To do that we can use cargo features:
cargo run --features=gui
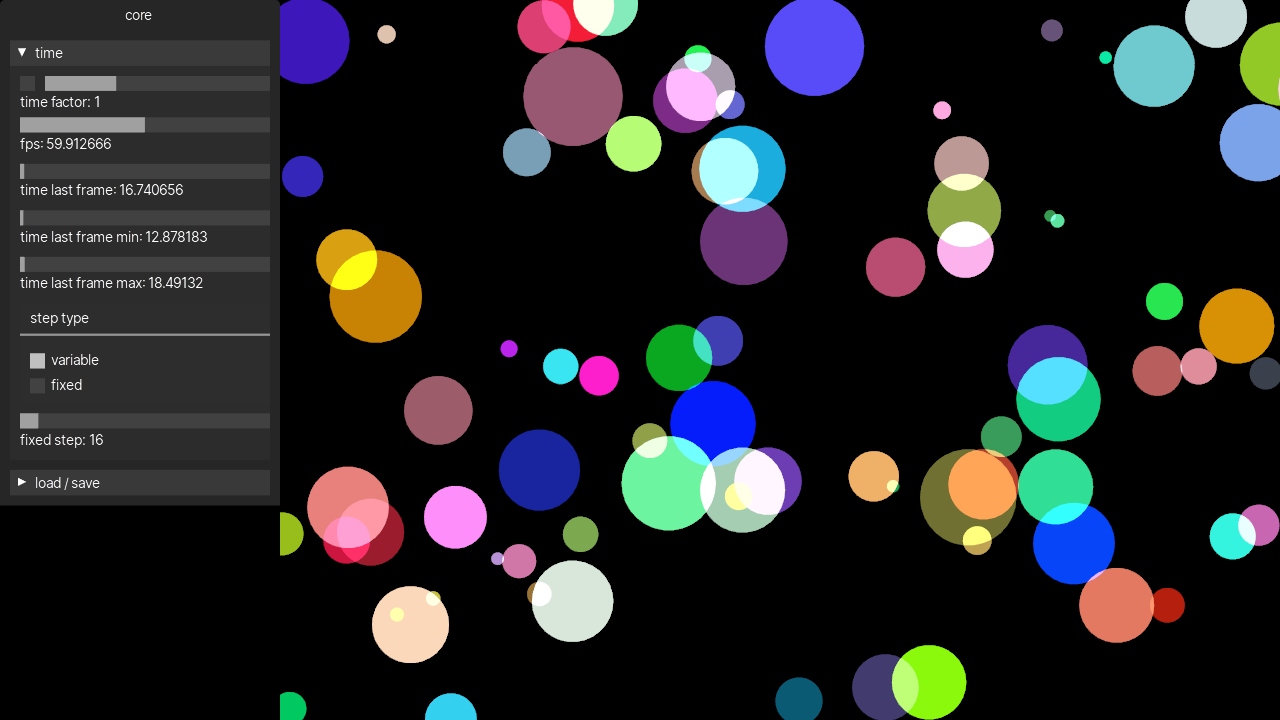
The application will now show a gui in the left side of the window. In rin every bundle we add to our application can easily add a gui which makes it really convenient to adjust certain parameters that would take a lot of tweaking to do via code.
The first tab core contains the gui for the rin core. There you can find for example time information and adjustments that are really useful when working with animations.
For example adjusting the time factor we can change the speed at which the circles move. This panel also show the current fps of the application, the last frame time and the last minimum and maximum frame times in the last second which are useful to check he application is running in real time without problem.
In the time panel we can also find a step type and a fixed step slider. With the normal step type, variable, the clock will return the real time but if we choose fixed and a fixed step time, it'll always return that time in ms for every frame. This is really useful when working with non real time applications to save recordings that are timed correctly when played back.
Apart from the time panel there's also a panel to load and save the application settings from the gui including a slider to "travel back in time" through all the changes we've ever done to an application.
You usually won't need to save settings manually since the gui takes care of saving the settings anytime a control is changed but you can also save a settings file from the load/save panel using the path textbox and the path navigator to select the folder where to save the settings.
If we now run the basic_example in the core tab we'll get some debug info from the renderer showing the number of active materials and programs which is useful to optimize applications.
A second tab postprocessing that comes from the postprocessing bundle that is added in the setup of this example. There we can enable and adjust different postprocessing effects. Like bloom, SSAO, depth of field, tone-mapping... To understand better the different postprocessing effect options, check the documentation of the postprocessing module.
Stats
Another useful feature in rin is the stats feature to enable it again let's go back to the immediate_renderer example and let's compile it enabling the stats and gpu_stats features along with the gui.
cargo run --features=gui,stats,gpu_stats
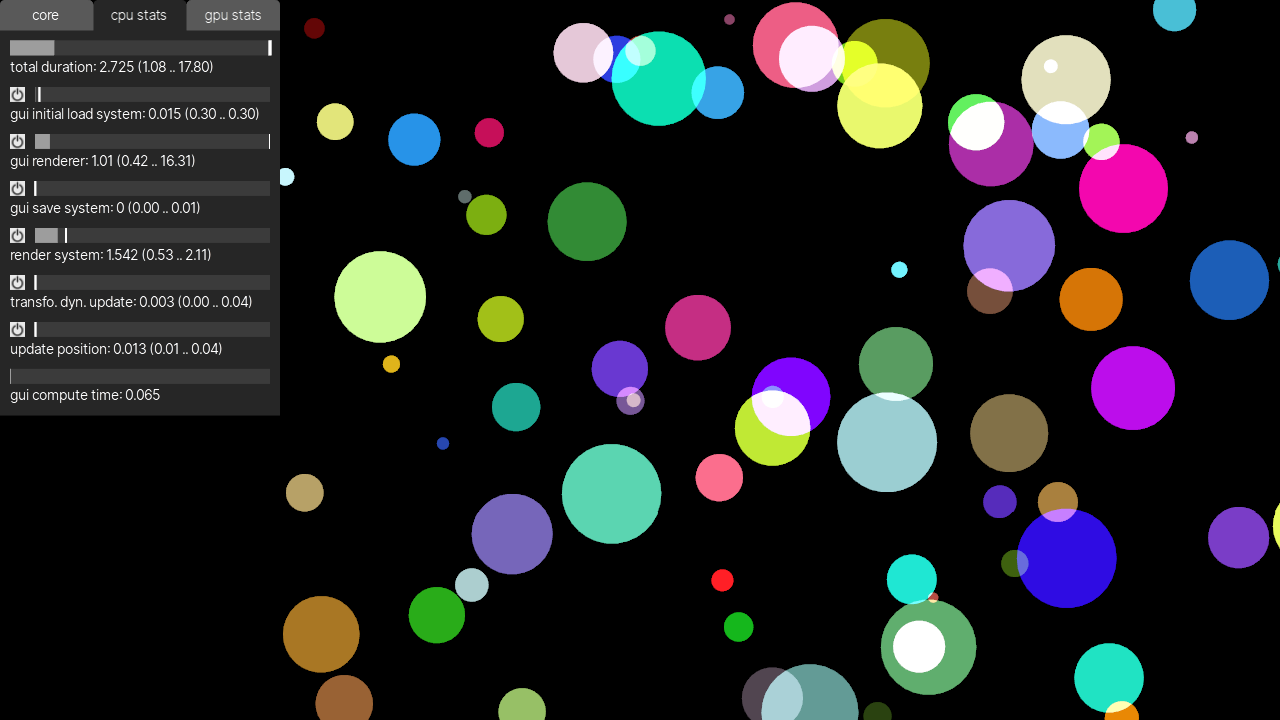
Now we can see two new tabs, cpu stats and gpu stats there we can see every system running in our application and how long they take to run every frame. The main value is filtered over several frames and the ticks in the slide and the range in the value for each system indicate the minimum and maximum times each system took to run in the last second. The filtered value is useful to quickly see which systems take longer to run so we can optimize where it matters. The minimum and maximum values let us see outliers in systems that might only eventually run and that might take excessively long but the real value would get hidden because of the filtering.
In the immediate_renderer example we'll see several systems, all related to the gui rendering but not our own. In order to show our own systems we need to give the a name. To do that in the app.rs file, above each of the system functions declaration we can add:
#[update_system(name = "update velocity")]
fn update_velocity(clock: &Clock, entities: Entities, resources: Resources) {
To the update velocity function, and the in the render system function:
#[render_system(name = "render system")]
fn render_system(
The #[*_system] syntax allows to annotate the different systems with a name and more options that we'll see in next chapters. If we run now the example we'll see in the cpu stats the times for each of the systems with the render system being the one that takes more time. In the gpu stats tab, we'll only have the gui renderer and our own render system, since that's the only two systems that currently run on the gpu.
Until now we've been running our application in debug mode cause it's faster to compile and also allows us to use a debugger if needed. That makes the stats times really high. To compile the application in release one can use:
cargo run --features=gui,stats,gpu_stats --release
When profiling an application is usually recommended to use the release profile.
the stats feature also allows to temporarily pause certain systems in our application. In the cpu stats tab we can press on the button next to each slider to pause and resume the execution of any system in the application.
The stats feature also provides a way to export a view of a full frame and how the systems are running during that frame. To do that we can use the method export_tracing_stats in the scene. The saved file can be seen in chrome or chromium by opening the url: about://tracing and from the opening the saved file.
To test it let's open the main.rs file of the immediate_renderer example and first of all add the necessary imports. At the top of the file we add:
use rin::prelude::*;
use rin::window;
Then before the while !should_close loop:
#[cfg(feature="stats")]
let mut ctrl_s_pressed = scene
    .event_stream()
    .keys()
    .pressed_with_mods('s', window::KeyModifiers::CONTROL)
    .map(|_| ())
    .to_property_last_value(());
Which will create a PropertyLastValue that we can query to know if Ctrl + s has been pressed. Then inside the loop on the last line we add:
#[cfg(feature="stats")]
if ctrl_s_pressed.last_value().is_some() {
    scene.export_tracing_stats("stats.json");
}
Which will save the current frame tracing statistics to stats.json file. If we now run the example again and press Ctrl + s we'll get a stats.json file that when opened in chrome show something like:

Which shows how the update velocity system runs first for a very short period of time and then the render system and gui renderer which take longer. They are on different rows because they run on different threads. We'll show in later chapters how certain systems run in parallel in different threads.
Clicking on each of the bars will show information about each system including, it's start and end times and it's duration.
Bundles GUI
Rin Bundles can very easily add their own parameters to the gui. When adding a bundle to the scene if it provides any parameter it will automatically show up in the gui. We've already seen them when compiling the basic_example where the postprocessing bundle adds it's parameters to the gui. Let's try adding an external bundle, for example the inspector bundle from the rin_inspector crate.
First of all let's add the crate to the immediate_renderer example. Inside it's directory, from the terminal:
cargo add rinecs_inspector --registry rin_rs
Now at the beginning of the setup functiom, for example right after adding the update_velocity system let's add:
scene_builder.add_bundle(rinecs_inspector::Inspector::new());
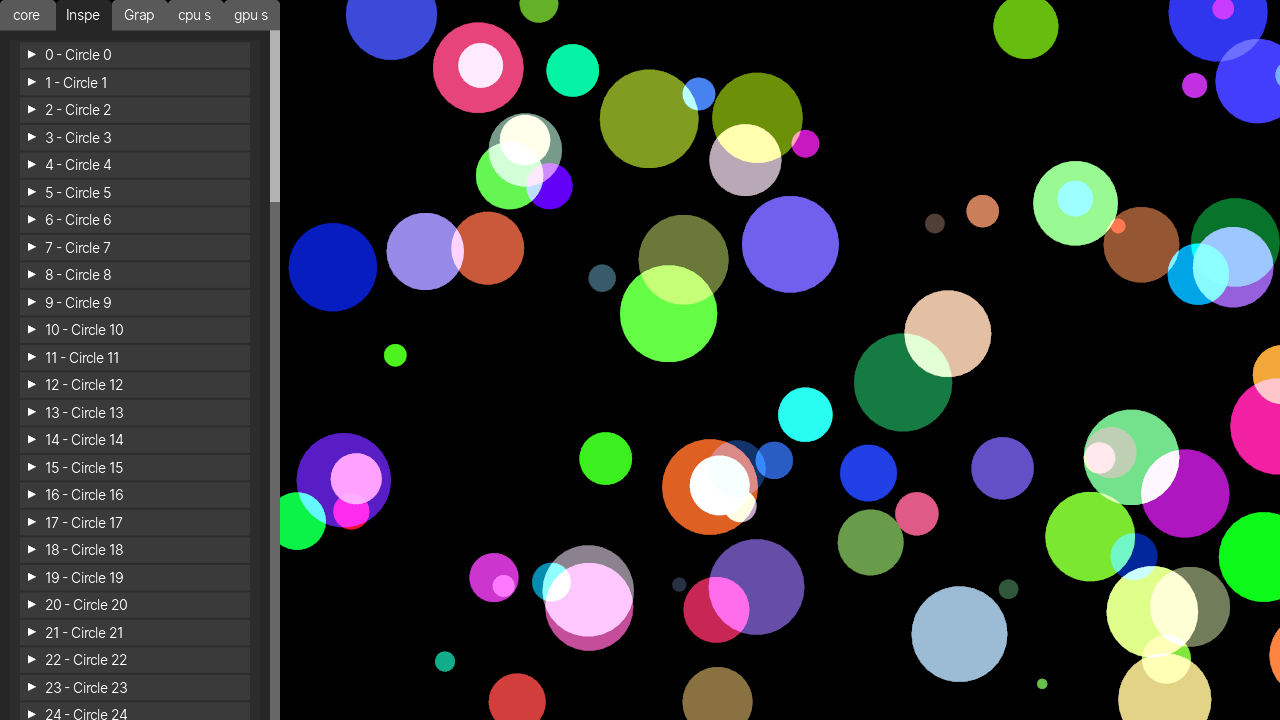
Now if we run the project again we'll get two new tabs in the gui, in the first one, inspector, we get a panel for each entity in the scene, if we unfold any of them we can see all the components that entity has. When entities have a Name the inspector will show it as well. Let's add it to see how it works, to do so we change the for loop that adds all the entities in setup to:
for i in 0..100 {
    scene.new_entity()
        .add(Name(format!("Circle {}", i)))
        .add(Position(pnt2(rand::random::<f32>() * w, rand::random::<f32>() * h)))
        .add(Size(rand::random::<f32>() * 90. + 10.))
        .add(Velocity(vec2(rand::random::<f32>() * 20. - 10., rand::random::<f32>() * 20. - 10.)))
        .add(Color(rgba!(rand::random(), rand::random(), rand::random(), 0.1)))
        .build();
}
When we now run the application, the inspector panel shows the right name for each circle.
The second tab graphs, can be used to show the progression of a certain value. If we go in the inspector tab and unfold the position of any of the circles, next to the x and y components there's a button with the icon of a graph. Pressing it we create a graph in the graphs tab that will show the progression of that value over time.
Finally, when adding bundles in a complex application the number of tabs in the main gui can get too high and be really difficult to use. To avoid that problem we can group several bundles in one tab. For example we can change the line that adds the inspector to:
scene_builder.add_bundle_to_group(rinecs_inspector::Inspector::new(), "inspector");
And now both of the inspector tabs go into one as foldable groups. If we added any other bundle to the group "inspector" it would also be added to the same tab.

The bundles chapter shows among other things how to create a gui for our own bundles.
Advanced Systems
In the previous examples we've seen how to create entities with their components and then systems that based on those components execute specific actions. In this chapter we'll review more advanced uses of systems, each possible system type and what's their most common use.
System dependencies
Let's continue where we left the immediate renderer example. In this example we had several components that define circles in the screen a system that updates the position of every circle, and a render system that draws all the circles. Let's modify it so the circles not only move around but also change in size. For that let's first add new Phase and BaseSize components that will allow us to have different sizes for every circle while they change:
#[derive(Clone, Copy, Debug, Serialize, Deserialize, Component)]
struct Phase(f32);

#[derive(Clone, Copy, Debug, Serialize, Deserialize, Component)]
struct BaseSize(f32);
Let's add them to every entity:
for i in 0..100 {
    scene.new_entity()
        .add(Name(format!("Circle {}", i)))
        .add(Position(pnt2(rand::random::<f32>() * w, rand::random::<f32>() * h)))
        .add(Size(rand::random::<f32>() * 90. + 10.))
        .add(BaseSize(rand::random::<f32>() * 90. + 10.))
        .add(Phase(rand::random::<f32>() * 2. - 1.))
        .add(Velocity(vec2(rand::random::<f32>() * 20. - 10., rand::random::<f32>() * 20. - 10.)))
        .add(Color(rgba!(rand::random(), rand::random(), rand::random(), 0.1)))
        .build();
}
And now let's add a new system that changes the size of each circle:
#[update_system(name = "update size")]
fn update_size(clock: &Clock, entities: Entities, resources: Resources) {
    let delta = clock.game_time_delta().as_seconds() as f32;
    for (size, phase, base) in entities.iter_for::<(Write<Size>, Write<Phase>, Read<BaseSize>)>() {
        phase.0 += delta;
        size.0 = (phase.sin() * 0.5 + 0.5) * base.0;
    }
}
The system goes through every entity with size, phase and base size and updates the phase adding the delta to it then uses the phase to calculate the new size of the circle.
Finally in order for this system to run we need to add it to the scene:
scene_builder.add_update_system(update_size);
Now if we run the application the circles not only move but also change in size. If we run it using the stats and gui features with:
cargo run --features=gui,stats
In the cpu stats tab in the gui we can now see both update systems and can even stop one or the other which is sometimes useful for debugging.
Another advantage of dividing the functionality in simple systems is that systems run in parallel. The two update systems will now run at the same time and although in this case it's surely not a huge advantage given how little time they take to calculate, in larger applications it can make a big difference.
But how does rin know which systems can run in parallel, simultaneously? In the default mode in principle any system we create will be run in parallel. The main problem we encounter when running code in parallel is accessing the same data for writing. If two different systems would access the same component and write to it at the same time the data would end up in a state that is not correct.
Another problem that arises with dividing the application functionality in systems is deciding which systems run first, the order of execution. In the previous example the two update systems are completely independent and so they can run simultaneously or one after the other no matter the order. We can update the position and then the size or the size and then the position but we want the render system to run after updating the data, after both update systems have run.
The main tool to avoid this problems in rin are system dependencies. System dependencies allow us to express which systems depend on which so they run in the correct order and which systems read and write to which data to avoid two systems that write to the same data from ever running simultaneously.
The type of system dependencies available in rin right now are the following:
Needs / Updates
In order to add system dependencies we use annotations, as we've already used in the adding movement chapter. Let's add them to our systems in the immediate render with size example:
#[update_system(name = "update position")]
#[updates("Position", "Velocity")]
#[needs("Velocity")]
fn update_position(clock: &Clock, entities: Entities, resources: Resources) {
// ...


#[update_system(name = "update size")]
#[updates("Size", "Phase")]
#[needs("BaseSize")]
fn update_size(clock: &Clock, entities: Entities, resources: Resources) {
// ...


#[render_system(name = "render system")]
#[needs("Position", "Size", "Color")]
fn render_system(
    gl: &gl::Renderer,
    viewport: Rect<i32>,
    entities: EntitiesThreadLocal,
    resources: ResourcesThreadLocal
){
// ...
The idea behind the system of dependencies is expressing which components or resources each system needs or updates. That way if two systems for example update the component Position rin won't run them at the same time. This also solves the problem of the order of execution. Since the system update_position updates Position and the render_system needs Position, update_position will always run before render_system. This is a really easy way to express order of execution without really knowing how every system in the application depend on each other, only through dependencies on data, not directly on other systems.
When a rin application runs for the first time after setting up the scene, it internally creates a dependencies graph using the dependencies information and from there on it'll use that dependency graph to run the systems in the correct order and avoid two systems that write to the same data from running simultaneously.
Sometimes we might have expressed a circular dependency in which case rin will panic with a message explaining the problem so we can take the right measures to solve it.
Reads / Writes
As we've seen when we've first run the application, dependencies are not really needed and their only function is to express how systems depend on each other to determine and order of execution and avoid systems from concurrently trying to write to the same data.
Sometimes, for example when a circular dependency happens we need to decide if the dependency for a certain system is really a need or update or we just need to protect against simultaneous access. Some systems might update a certain component but not need the latest version of it, in such cases there's no need to express such dependency which helps solving circular dependencies. Then we can always use:
#[writes("Position")]
#[reads("Velocity")]
To express that a system writes or reads from those components but doesn't necessarily need to run before or after other systems that might update or need them. That allows systems that write to the same component or resource to not run simultaneously without specify an specific order.
Artificial dependencies
Dependencies on data can even be artificial, on types that are not really used but allow to specify relations of dependencies. For example, the rin system that updates all the Nodes to calculate their global position, rotation and scale and it's transformation matrices, depends as a needs on rin::graphics::NodeParts which is an empty type that is only used as a dependency and is never really added to the scene.
This type can be used by systems in applications to express that they are updating or need only the local parts of the Node, while depending on the Node itself expresses that we need also the global parts of it.
For example:
#[system(name = "update position")]
#[updates("NodeParts")]
fn update_position(entities: Entities, resources: Resources) {
// ...

#[system(name = "render")]
#[needs("Node")]
fn render(entities: Entities, resources: Resources) {
// ...
And where update_nodes is the system that hierarchically updates the global components and transformation matrices of every node in the scene.
We would end up with a dependency graph like:
update_position -> update_nodes -> render
Since update position updates NodeParts, update_nodes needs NodeParts and updates Node and render needs Node.
After / Before
Until now, all the dependency types depended on data, on types that our systems use or even on artificial dependencies, types that we don't really use but help express partial dependencies or similar. In the case of after / before dependencies, we don't depend on data but directly from system to system.
This are usually the least used since our systems are running in parallel with systems from rin itself and also from external bundles for which we usually don't know the systems names so expressing dependencies in terms of data makes things easier since we only need to know which data we are using instead of what other systems there are in the application.
Even with that in some cases, mostly for systems that are related and usually in the same module or crate we can use after / before:
#[system(name="system A")]
fn system_a(entities: Entities, resources: Resources) {
    // ...
}

#[system(name="system B")]
#[after("system_a")]
fn system_b(entities: Entities, resources: Resources) {
    // ...
}
or:
#[system(name="system A")]
fn system_a(entities: Entities, resources: Resources) {
    // ...
}

#[system(name="system B")]
#[after_name("system A")]
fn system_b(entities: Entities, resources: Resources) {
    // ...
}
or:
#[system(name="system A")]
#[before("system_b")]
fn system_a(entities: Entities, resources: Resources) {
    // ...
}

#[system(name="system B")]
fn system_b(entities: Entities, resources: Resources) {
    // ...
}
or:
#[system(name="system A")]
#[before_name("system B")]
fn system_a(entities: Entities, resources: Resources) {
    // ...
}

#[system(name="system B")]
fn system_b(entities: Entities, resources: Resources) {
    // ...
}
Which are all equivalent and express that system A needs to run before system B
Barriers
The last tool rin provides to allow systems synchronization are barriers. A barrier is a simple struct with an annotation as:
#[barrier(name = "some barrier")]
pub struct SomeBarrier;
And then added to the scene as:
scene_builder.add_barrier(SomeBarrier);
Then if we had for example some update systems update_A, update_B and update_C and a render_system one way to make all the update systems run before the render system is to make them all run before the barrier using a before dependency on the barrier and then make the render system run after the barrier by using an after dependency on the barrier.
Debugging
Sometimes a system might not run in the order we expected, something might seem to not move or perhaps a jittery movement is sometimes a signal that a system is running in the wrong order.
A useful tool to debug and understand an application order of execution and dependencies is the dependencies graph renderer. Once we've added all the systems to our application we can run:
scene.render_systems_dependency_graph("systems.dot");
And it'll create a systems.dot file which contains the dependency graph for the application. This files can be opened with any GraphViz viewer and if you use visual code as IDE even with an addon for it.
For example the resulting dependencies graph for the modified immediate renderer example looks like:
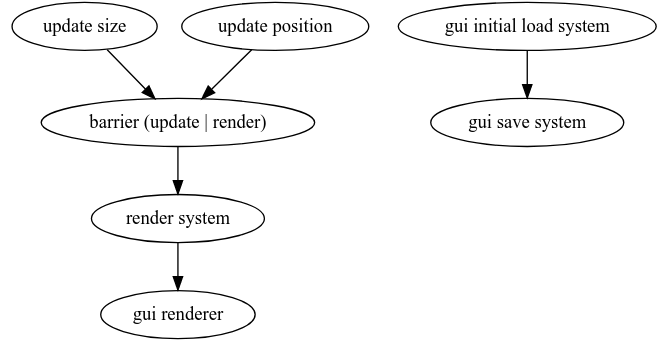
The barrier that appears in the graph is automatically added by rin between update and render systems and allows to easily make all update systems run before the render system even without expressing dependencies. When we add update systems, rin automatically makes them all run before the update | render barrier and when we add render systems they all depend as running after the barrier to ensure that render systems never run before all updates are done.
Parallel systems
Running systems in parallel is usually a performance gain but it creates some problems that we need to deal with, the following sections present three alternatives to work with parallel systems in rin.
Optional dependencies
As we've seen at the beginning marking dependencies is optional. By default a rin application can run without expressing any dependencies and as long as all the systems can run in an undefined order and we depend on the default update | render barrier everything should work without problem.
Even systems that might write to the same component can run simultaneously since rin by default protects them using a read/write lock so if two systems try to access the same component at the same time one of them will be paused until the other is done.
This can be problematic some times, inducing what is call a deadlock. For example system A ends up waiting on system B cause they both try to write to the same resource but then B needs to access data that A already has locked so they both end up waiting each other and the application hangs indefinitely.
The best way to avoid this is expressing the dependencies but when it happens in an application with a few systems it might be hard to find out. To make it easier to debug rin provides a feature, debug_locks, that will make an application, where two systems try to access the same resource for writing simultaneously, panic and give us information about the problem. Then we can easily add the suggested dependencies.
To use it we just need to run our application as:
cargo run --features=rin/debug_locks
Lock free mode
Rin can also be run in lock free mode, in this mode, expressing all dependencies at least as read or write is mandatory. Since it doesn't use any locks it can be faster but also avoids deadlocks since it forces each system to express all the data it writes or reads. This provides rin enough information to order the systems execution in a way where there will never be two simultaneous writes to the same data, either component or resource.
This mode is recommended for more complex applications with multiple systems that need every last bit of performance since avoiding locks will make things faster but also it avoids deadlocks which can be cumbersome to debug in bigger applications.
Some systems types avoid having to express all the dependencies which can make writing systems in this mode a bit less verbose.
To use lock free mode we just need to enable the corresponding feature:
cargo run --features=rin/lock_free
Single threaded mode
Finally even if rin makes using parallel systems relatively easy, managing dependencies or things like deadlocks can end up being cumbersome and make programming too verbose when we want to just do something relatively simple. In those cases we can just remove the multi-threading feature which will get rid of the concurrency problems at once. In this mode we'll just need to express some dependencies to have a correct order of execution.
In order to do that you can just edit your Cargo.toml and from the [dependencies.rin] section remove or comment out "parallel_systems"
Using single threaded mode still allows for other kinds of parallelism that are simpler to use and in a lot of cases even more effective: Instead of running more than one system simultaneously we can iterate and process entities' components in parallel. The section "Parallel iterators" looks a bit into that.
Also since single thread mode avoids using any locks or atomics at all in some cases it might end up being even faster than using multi-threading, mostly when combined with parallel iterators for the most cpu demanding tasks.
Systems types
Although systems always follow the same basic principle: run code that reads and modifies entities' components and resources, the behavior of an application, there's some different types that have particular characteristics that make them more or less indicated for certain situations.
Foreach systems
In the Adding movement chapter we created a system that iterates over every entity that has both a node and a velocity components and changed the node position by adding to it the velocity multiplied by the current frame duration:
#[system_foreach(name = "movement")]
#[updates("Node")]
fn movement(node: Write<Node>, velocity: Read<Velocity>, clock: Res<Clock>) {
    let delta = clock.game_time_delta().as_seconds();
    let translation = velocity.0 * delta as f32;
    node.translate(&translation);
}
In that system we used what's called a foreach system. A foreach system, is a function called once per frame for each entity that has all the components indicated by it's parameters. The parameters can be of two types:
-
Operators like
ReadorWritewhich participate in the selection of the entities. For example, since the movement system has bothWrite<Node>andRead<Velocity>it will select every entity that has both these types of data and will allow the system to access theNodefor writing and theVelocityonly for reading. -
Resources by using
ResorResMut. For example in the movement system theClockis a resource that we receive as read only. UsingResMutwe can use a resource for writing to it.
In order to create a foreach system it's mandatory to use the #[system_foreach(name="name")] annotation. Trying to use a simple function with the correct parameters but no annotation to the scene or scene_builder will fail.
A note on resources
Resources are global data that can be accessed from anywhere. They can be added using:
scene.add_resource(my_resource);They are useful for utility objects that we need to use from several systems. The chapter on rin resources explains the topic in more depth and shows which ones are available by default in a rin application.
An advantage of foreach systems is that they already express the components they use and if they use them for reading or writing so except for need / update type of dependencies we don't need to annotate them further.
Plain systems
The most common system in rin is either a function or a struct implementing the System trait. For example the movement foreach system would look like the following when turned into a plain system:
fn movement(entities: Entities, resources: Resources) {
    let clock = resources.get::<Clock>().unwrap();
    let delta = clock.game_time_delta().as_seconds();
    for (node, velocity) in entities.iter_for::<(Write<Node>, Write<Velocity>)>() {
        let translation = velocity.0 * delta as f32;
        node.translate(&translation);
    }
}
As can be seen the system is slightly more verbose but it's also more flexible. For example the delta time value is in this case only retrieved once, instead of once per entity as in the foreach example. The cost for this call, game_time_delta(), is negligible but in some cases we might need to do costly calculations common to every entity and a foreach system doesn't allow to them only once.
A plain system can be added without any annotation but can also be annotated so it appears on statistics and to express dependencies:
#[system(name = "movement")]
#[updates("Node")]
#[reads("Velocity", "Clock")]
fn movement(entities: Entities, resources: Resources) {
    let clock = resources.get::<Clock>().unwrap();
    let delta = clock.game_time_delta().as_seconds();
    for (node, velocity) in entities.iter_for::<(Write<Node>, Read<Velocity>)>() {
        let translation = velocity.0 * delta as f32;
        node.translate(&translation);
    }
}
The Entities object also allow to access components in more complex or flexible patterns like accessing one specific component for a specific entity, accessing storages which allow certain optimizations in some cases or accessing related components in nested loops.
For example if we wanted to check collisions between every entity with a position and a bounding box component, we would need to iterate through every entity with those components from nested loops, checking every entity for every other entity which a foreach system wouldn't allow.
Another way to implement a plain system is using a struct that implements the rin::ecs::System trait:
struct Movement;

#[system(name = "movement")]
#[updates("Node")]
impl<'a> rin::ecs::System<'a> for Movement {
    fn run(&mut self, entities: Entities, resources: Resources) {
        let clock = resources.get::<Clock>().unwrap();
        let delta = clock.game_time_delta().as_seconds();
        for (node, velocity) in entities.iter_for::<(Write<Node>, Read<Velocity>)>() {
            let translation = velocity.0 * delta as f32;
            node.translate(&translation);
        }
    }
}
The advantage of using this syntax is that a system can keep it's own state without needing to store it in a resource or similar.
Finally a closure that takes the right arguments can also be a system:
scene_builder.add_system(|entities: Entities, resources: Resources| {
    let clock = resources.get::<Clock>().unwrap();
    let delta = clock.game_time_delta().as_seconds();
    for (node, velocity) in entities.iter_for::<(Write<Node>, Read<Velocity>)>() {
        let translation = velocity.0 * delta as f32;
        node.translate(&translation);
    }
});
And we can even express dependencies and its name with:
scene_builder
    .add_system_with(|entities: Entities, resources: Resources| {
        let clock = resources.get::<Clock>().unwrap();
        let delta = clock.game_time_delta().as_seconds();
        for (node, velocity) in entities.iter_for::<(Write<Node>, Read<Velocity>)>() {
            let translation = velocity.0 * delta as f32;
            node.translate(&translation);
        }
    })
    .name("movement")
    .updates::<Node>()
    .reads::<Velocity>()
    .reads::<Clock>()
    .build();
Opposed to foreach systems, plain systems, don't express which components they use in their signature so we need to explicitly do so, mostly when using the lock free mode.
Storage systems
An intermediate type of system between a foreach system, very concise but not very flexible and a plain system, very flexible but very verbose, is a storage system. In an storage system the parameters to the function are storages instead of individual components. This allows to get everything already in the function parameters, automatically express which components the system uses for reading and writing and still have the flexibility of reusing the storages:
#[system_storages(name = "movement")]
#[updates("Node")]
fn movement(query: Sto<(Write<Node>, Read<Velocity>)>, clock: Res<Clock>) {
    let delta = clock.game_time_delta().as_seconds();
    for (node, velocity) in query.iter() {
        let translation = velocity.0 * delta as f32;
        node.translate(&translation);
    }
}
or even:
#[system_storages(name = "movement")]
#[updates("Node")]
fn movement(node: Sto<Write<Node>>, velocity: Sto<Read<Velocity>>, clock: Res<Clock>) {
    let delta = clock.game_time_delta().as_seconds();
    for (node, velocity) in (&mut node, &velocity).iter() {
        let translation = velocity.0 * delta as f32;
        node.translate(&translation);
    }
}
In the first example we directly retrieve a query that we can use as many times as we want (although not simultaneously since the node is accessed for writing). In the second one we get the storages separately and then we combine them to form a query over all entities that have both components.
Again the first example is a bit simpler but the second is more flexible. In the second example we can use the storages separately and combine them however we want.
In this kind of systems we already express reads and writes in the system signature so there's no need for read / write annotations.
The same way as foreach systems the system_storages annotation is needed for this systems and not using them will fail when adding the system to the scene with:
scene_builder.add_system(movement);
Update systems
Update systems are a very specific type of systems, mostly used when using the immediate renderer model. They simplify dependencies by automatically depending on a barrier so they always run before a renderer and they receive the clock by default since that's almost always needed on update systems.
For example, in the immediate renderer chapter, we created an update system that changes the position of every entity with both position and velocity:
#[update_system(name = "update position")]
fn update_position(clock: &Clock, entities: Entities, resources: Resources) {
    let viewport = resources.get::<Viewport>().unwrap();
    let delta = clock.game_time_delta().as_seconds() as f32;
    for (pos, vel) in entities.iter_for::<(Write<Position>, Write<Velocity>)>() {
        pos.0 += vel.0 * delta;
        if pos.x < 0. || pos.x > viewport.width as f32 {
            vel.x = -vel.x
        }
        if pos.y < 0. || pos.y > viewport.height as f32 {
            vel.y = -vel.y
        }
    }
}
Apart from receiving the clock as a parameter and auto-depending on a barrier to make them always run before the renderer systems, there's no differences with a plain system.
Render systems
Similar to update systems, render systems are mostly used with immediate renderer applications but in this case they are sometimes also useful in the scene graph like model when we want to draw some simple elements on top of our scene, like some gui elements or some debug information.
We also used them in the immediate renderer chapter:
#[render_system(name = "render system")]
fn render_system(
    gl: &gl::Renderer,
    viewport: Rect<i32>,
    entities: EntitiesThreadLocal,
    resources: ResourcesThreadLocal
){
    gl.clear(&BLACK);

    let gl = gl.with_properties(&[
        gl::Property::Blend(true),
        gl::Property::BlendFunc(gl::ONE, gl::ONE_MINUS_SRC_ALPHA),
    ]);
    let iter = entities.iter_for::<(
        Read<Position>,
        Read<Size>,
        Read<Color>
    )>();
    for (pos, size, color) in iter {
        gl.draw_circle_fill(pos, size.0 / 2., 30, &color.0)
    }
}
In this case the system receives two extra parameters a gl::Renderer and a viewport as a Rect<i32> the gl renderer can be used to draw to the screen and the viewport is sometimes useful if we need to setup the view with a camera or similar.
Apart from that it's usage is the same as that of a plain system. One difference here is that both the entities and the resources are now ThreadLocal. This means that this system will always run in the main thread and that with it's entities and resources we can access components and resources that might not be thread safe.
Thread local systems
As explained in the last section, some times we need to access data that is not thread safe, that can only be accessed from the thread it was created from. This can happen for both entity components and resources. For example gl resources like the renderer itself, textures, buffers ... can only be used from the thread they were created in, so a thread local system is needed. Also some events related types are not thread safe in which case they can only be accessed from a thread local system.
All the systems that we've seen until now have thread local versions. To use them we just need to change their entities and resources to EntitiesThreadLocal and ResourcesThreadLocal respectively. Also the annotations that specify the type and name of system need the _thread_local suffix. So system_foreach becomes system_foreach_thread_local and system becomes system_thread_local
When adding the to the scene we also need to add the _thread_local suffix. so scene.add_system(system) becomes scene.add_system_thread_local(system_tl).
Apart from that their usage is exactly the same as their non thread local versions.
Although thread local systems run in the main thread, other systems might run in parallel with them.
Creation systems
Creation systems are used to create new entities, entities' components and resources once the application is running. Their use is pretty similar to any other plain system:
fn circles_creation_system(entities: CreationProxy, resources: ResourcesThreadLocal) {
    entities.new_entity().add(Position(pnt2(0., 0.))).build();
}
That is then added to the scene using:
scene_builder.add_creation_system(circles_creation_system);
Creation systems right now run always on the main thread and always alone with no other system running at the same time. This might change in the future though.
Parallel iterators
Parallel iterators allow to process entities' components in parallel it's an alternative to running systems in parallel although both things can happen simultaneously.
To use parallel iterators we need to retrieve the storage for the component or query that we want to iterate over. Let's for example transform the update position system from the immediate renderer example to run in parallel.
In order to use parallel iterators we need to add the crate rayon to our application:
cargo add rayon
Then we import rayon's prelude from whereever we want to use ti:
use rayon::prelude::*;
Finally let's see how the update system looks converted to use parallel iterators:
#[update_system(name = "update position")]
fn update_position(clock: &Clock, entities: Entities, resources: Resources) {
    let viewport = resources.get::<Viewport>().unwrap();
    let viewport = viewport.rect();
    let delta = clock.game_time_delta().as_seconds() as f32;
    let mut storage = entities
        .storage_for::<(Write<Position>, Write<Velocity>)>()
        .unwrap();
    storage.par_iter().for_each(|(pos, vel)|{
        pos.0 += vel.0 * delta;
        if pos.x < 0. || pos.x > viewport.width as f32 {
            vel.x = -vel.x
        }
        if pos.y < 0. || pos.y > viewport.height as f32 {
            vel.y = -vel.y
        }
    })
}
Now the foreach that updates the circles positions will run in parallel several iterations of the loop accelerating greatly the process. In this case of course given how little information we need to update and how simple the calculus, it's not going to make any difference and might even be slower due to having to send the tasks to the different threads, but for processes where a lot of information needs to be processed, parallel iterators are a really important and easy to use tool.
There's two particularities worth commenting about the example:
-
We need to get the viewport rectangle because the viewport resource can't be directly sent to a different thread. Resources can be thread safe or thread local and so they are protected by a generic smart pointer that is not marked as being thread safe. If we didn't had the line that gets the rectangle from the viewport resource:
let viewport = viewport.rect();The compiler would fail, giving us an error, saying that viewport can't be sent to a different thread, that it's not
Send. -
In order to use parallel iterators we need to first retrieve the storage. We could have also used a storage system as:
#[system_storages(name = "update position")]
fn update_position(
    mut storage: Sto<(Write<Position>, Write<Velocity>)>,
    viewport: Res<Viewport>,
    clock: Res<Clock>)
{
    let viewport = viewport.rect();
    let delta = clock.game_time_delta().as_seconds() as f32;
    storage.par_iter().for_each(|(pos, vel)|{
        pos.0 += vel.0 * delta;
        if pos.x < 0. || pos.x > viewport.width as f32 {
            vel.x = -vel.x
        }
        if pos.y < 0. || pos.y > viewport.height as f32 {
            vel.y = -vel.y
        }
    })
}
Parallel iterators use rayon to work so reading through the rayon documentation will give you some insights on how to use them.
Resources
We've already used resources in previous chapters, like the clock we use to control animations or the viewport that some examples retrieve as a resource. Resources are really easy to use but let's quickly see what they are, how they are created and retrieved and what resources are available by default in a rin application.
Resources are global data that can be accessed from anywhere, they are stored in the scene and available to every system in our application or even directly from the scene.
A resource can be any data type, it doesn't need any special annotation or implement or derive any specific trait. Let's say for example that we are working on a game with a grid like map. A possible resource could be the Map of the current level:
pub struct Cell {
    pub color: Rgb<f32>
}

pub struct LevelMap{
    pub grid: Vec<Cell>,
}

scene.add_resource(LevelMap{ grid: vec![] });
And that's it, now any system can read it or modify it:
pub fn map_updater(entities: Entities, resources: Resources) {
    let mut map = resources.get_mut::<LevelMap>().unwrap();
}

pub fn map_render(entities: Entities, resources: Resources) {
    let map = resources.get::<LevelMap>().unwrap();
}
Resources as traits
Resources can be added as traits so they can be accessed in a more generic way without knowing the exact type, only that they implement a certain trait:
trait Movement{
    fn translate(&mut self);
}

struct Ball;

impl Movement {
    fn translate(&mut self) {

    }
}

let ball = Ball;
scene.add_resource_as_trait(rin::ecs::cast!(ball as dyn Movement));
Only one trait is supported by now and resources added as traits can be also retrieved by their original type;
Thread local
A particular case of resources, as with entity components, are those that are not thread safe, not Send in rust terminology. They are used pretty much the same but have to be added using add_resource_thread_local and can only be used from thread local systems.
Resources can also be removed using remove_resource from either the scene or a CreationSystem.
Available resources in a rin application
When working with rin some resources are by default available that provide certain utilities. Here's the most important but every rin module usually documents which resources it makes publicly available.
When using a gl forward renderer and after adding a camera (which is mandatory) the following resources will be available:
rin::window::Windowalso available asrin::window::WindowExt: Allows to access the window properties, change the video mode, enable and disable vertical sync, etcrin::scene::renderer::material::MaterialPool: Gives access to the materials in order to change their properties for example.rin::scene::renderer::material::ShadowMaterialPool: Similar toMaterialPoolbut for shadow materials.rin::graphics::CameraExt: Also available as the original camera we add to the scene.rin::gl::Renderer: Useful to draw or create gl resources in auxiliary renderers or systems that use the gpu for general computing for example.rin::scene::renderer::materials::TexturePool: A pool of textures, allows to store textures that can then be used via a handle in materials, image based lights, etc.rin::scene::transformation::Viewport: Contains a rectangle with the current drawing viewport which depends on the application using a render surface or not, the gui being enabled or not, etc.rin::scene::renderer::resources::ScreenRenderBuffer: Only present when the renderer is setup with a render buffer. It's usually not needed from applications but might be useful for advanced usages. It contains the textures and render buffers the application renders to.rin::postpo::PostProcessingandrin::postpo::Parameters: The postprocessing pipeline and it's parameters, only available if the postprocessing bundle was added to the scene. Usually only used internally to apply the postprocessing effects but can be useful for certain advanced usages, mostly to access the final stage of the postprocessing in case we want to apply further effects externally before the final surface is blit to the screen.
When using the immediate renderer:
rin::window::Windowalso available asrin::window::WindowExt: Allows to access the window properties, change the video mode, enable and disable vertical sync, etc.rin::scene::transformation::Viewport: Contains a rectangle with the current drawing viewport which depends on the application using a render surface or not, the gui being enabled or not, etc.rin::gl::Renderer: Useful to draw or create gl resources in auxiliary renderers or systems that use the gpu for general computing for example.
Component operators
When retrieving entities' components, until now we've seen how we can access them for reading or writing using:
for (pos, vel) in entities.iter_for::<(Write<Position>, Read<Velocity>)>(){

}
Or similar syntaxes when using storages or foreach systems. In any case Read and Write are what we call in rin component operators, they allow us to retrieve components that follow certain conditions.
In the previous example we where retrieving all the entities that have both Position and Velocity, but there's other relations, conditions, that we can express with operators in order to select a certain set of entities and their components.
One of the paradigms often mentioned in ECS literature to explain ECS is SQL the old database language that allow to query data by expressing the columns and conditions between those columns of data. Rin tries to adapt some of those ideas by using operators which allow to express certain basic relations between the data in order to give more powerful tools to query entities and their components.
Let's see what are the available operators and how they can be used. Most of this chapter comes directly from the operators documentation but it's here as a way to make it more accessible and to point out the importance of this concept when working with rin.
Entity
This is one of the simples iterators. As we explained in the first chapters, in ECS the entities, are nothing more than a number, an ID that is related to several components. Although most of the time knowing about that number is not necesary, sometimes we might want to use it.
For example in a creation system we could want to delete every entity that match certain conditions, let's say everything that has a component Age that is more than 100. Since we can't iterate over components and remove entities at the same time, in this case we need to store the entities and then later use them to delete them:
#[derive(Clone, Copy, Debug, Serialize, Deserialize, Component)]
struct Age(usize);

fn remove_old(mut entities: CreationProxy, resources: Resources) {
    let to_delete = entities.iter_for::<(Entity, Read<Age>)>()
        .filter_map(|(entity, age)| if age.0 > 100 {
            Some(entity)
        }else{
            None
        }).collect::<Vec<Entity>>();

    for entity in &to_delete {
        entities.remove_entity(entity);
    }
}
Other uses for retrieving an entity is querying individual components or use them as a filter for another query...
Read / Write
Read and Write are the most common operators they matches all entities that contain this component for read only access in the case of Read
for pos in entities.iter_for::<Read<Position>>(){
    //...
}
or for read/write access in the case of Write
for pos in entities.iter_for::<Write<Position>>(){
    //...
}
Both examples will iterate over all entities that have a position component and return a reference to the position in the case of Read and a mutable reference to the position in the case of Write.
Has
Has is an operator that matches every entity that has a specific component without locking it's storage
When using the Has operator we won't have access to the actual component data, it just selects an entity that has that component. The selected data will have a () element in it's position.
The main difference with just using Read is that it's a bit faster but also it can be used simultaneously with a system writing to the same component. So a system using Read and another using Write to the same component won't run in parallel but a system using Has and another using Write can run simultaneously.
For example:
for (pos, _) in entities.iter_for::<(Read<Position>, Has<Velocity>)>(){
   //...
}
Will select all entities that have Position and Velocity but we can't access the velocity, the second element in the returned tuple is just a (), an empty type of data in Rust.
ReadOption / WriteOption
ReadOption and WriteOption match every entity no matter if it has the component or not. ReadOption will then return an Option of a reference to the component, and WriteOption an Option of a mutable reference.
The returned value will be None if an entity doesn't have that element. For example:
for (pos, vel) in entities.iter_for::<(ReadOption<Position>, Read<Velocity>)>(){
    if let Some(pos) = pos {
        // ...
    }
}
Will select all entities that optionally have Position and have a Velocity component. pos will be None for those entities that don't have Position.
HasOption
HasOption works similarly to ReadOption by matching every entity no matter if it has the component or not but instead of returning an Option with a reference to the value it returns a boolean that is true or false depending if the entity contains that component or not.
for (has_pos, vel) in entities.iter_for::<(HasOption<Position>, Read<Velocity>)>(){
    if has_pos {
        // ...
    }
}
Will select all entities that optionally have Position and have a Velocity component. pos will be false for those that don't have Position.
Same as with Has HasOption is more efficient than ReadOption and doesn't block the storage so it can be used simultaneously with systems that write to the same component.
Not
Not matches every entity that doesn't have this component. It doesn't make sense unless it's used in combination with some other operator since it returns an emoty ().
for (pos, _) in entities.iter_for::<(Read<Position>, Not<Velocity>)>(){
    //...
}
Will select all entities that have Position but no Velocity
ReadNot
ReadNot takes two component parameters instead of one and match every entity that has the first component and not the second.
It's equivalent to Read + Not but more convenient cause it doesn't return an extra empty component
for pos in entities.iter_for::<ReadNot<Position, Velocity>>(){
    //...
}
Will select all entities that have Position but no Velocity
ReadOr
ReadOr takes a tuple of components and matches any entity that has at least one of them. It returns a tuple of options of the selected components with the ones that the current entity has.
For example:
for (pos, vel) in entities.iter_for::<ReadOr<(Position, Velocity)>>(){
    if let Some(pos) = pos {
    }
    if let Some(vel) = vel {
    }
}
Matches all entities that have a Position a Velocity or both. pos and vel will be None for entities that don't have Position or Velocity respectively. At least one of them will be Some
HasOr
HasOr works the same as ReadOr it takes a tuple of components and matches any entity that has at least one of them but instead of returning a tuple of options of the components it just returns an tuple of booleans that are true or false depending if the current entity has that component or not.
for (has_pos, has_vel) in entities.iter_for::<HasOr<(Position, Velocity)>>(){
    if has_pos {
    }
    if has_vel {
    }
}
Matches all entities that have a Position a Velocity or both. pos and vel will be None for entities that don't have Position or Velocity respectively.
Ref
In rin there's a special type of component called an NToOneComponent that allows to reference other components. An NToOneComponent express a relation from N entities to one component. This for example allows to use the same geometry from different entities.
To use it we need to derive NToOneComponent instead of Component for reference components the we can use the Ref operator which takes the reference component and the referenced one as parameters:
#[derive(Debug)]
struct Vertex;
#[derive(NToOneComponent, Debug)]
struct GeometryRef(Entity);
#[derive(Component, Debug)]
struct Geometry(Vec<Vertex>);

let geometry = scene.new_entity()
    .add(Geometry(vec![Vertex, Vertex, Vertex]))
    .build();
let a = scene.new_entity()
    .add(GeometryRef(geometry))
    .build();
let b = scene.new_entity()
    .add(GeometryRef(geometry))
    .build();

for geometry in entities.iter_for::<Ref<GeometryRef, Read<Geometry>>>() {
    //...
}
The example creates three entities, the first one a geometry, the second and third two entities that instead of having a geometry directly as component, have a GeometryRef which references the actual geometry. To then access the geometry we use Ref<GeometryRef, Read<Geometry>> which returns a reference to the geometry.
When using Ref it's important to take into account that we are referencing the same component from several entities so using Ref along with Write might not have the intended consequences given that we might be modifying the same component multiple times in the same loop.
ReadRef
Ref<A, B> just an alias for Ref<A, Read<B>>. The previous example could also be written as:
for geometry in entities.iter_for::<ReadRef<GeometryRef, Geometry>>() {
    //...
}
OneToNComponent
To understand the next operator first we need to know about another kind of special component, OneToNComponent This kind of component stores a slice of the type instead of one per entity. To use it we just need to derive it for the corresponding component instead of using the usual Component.
When a component is of OneToNComponent type then operators that allow access to the data (ie: not Has*) will return a SliceView or SliceViewMut instead of a reference or mutable reference to the component. A SliceView or it's mutable version are just wrappers around a slice of values and can be used as a normal rust slice, iterated, indexed, etc.
For example:
#[derive(Clone, Copy, Debug, Serialize, Deserialize, OneToNComponent)]
struct Position(Pnt2);
for positions in entities.iter_for::<Read<Position>>(){
    for position in positions {

    }
}
Now the Read operator returns a slice of positions instead of a reference to one.
RefN
RefN only works with OneToNComponent and is similar to Ref but instead of returning a reference to a component it works with a OneToNComponent that points to entities and returns a SliceView of the referenced components. In a way it provides an N to N relation.
#[derive(OneToNComponent, Clone, Copy, Serialize, Deserialize)]
pub struct GeometryRef(pub Entity);

for geometries in entities.iter_for::<RefN<GeometryRef, Read<Geometry>>>() {
    for geometry in geometries {

    }
}
ReadAndParent / WriteAndParent
ReadAndParent and WriteAndParent allow to acccess an entity's component and it's parent for hierarchical components, those that derive HierarchicalComponent instead of the usual Component. Those components have a hierarchical structure, they are stored as a tree and when adding new components of this type to an entity they can be marked as being the child of another entity.
#[derive(HierarchicalComponent, Debug, Serialize, Deserialize)]
struct Position{x: f32, y: f32}

let e1 = scene.new_entitty()
    .add(Position(0., 0.))
    .build();

scene.new_entity()
    .add_child(&e1, Position(1., 1.))
    .build();

for (pos, parent_pos) in entities.ordered_iter_for::<ReadAndParent<Position>>(){

}
In the previous example the second entity's Position component is added as a child of e1. When iterating over the Position components using ReadAndParent we get a tuple with the Position component for the current entity and it's parent position as an Option<&Position> if the entity doesn't have a parent the second member of the tuple will be None.
The ReadAndParent operator has to be used with ordered_iter_for instead of iter_for and it goes through the entities in hierarchical order. That way we always go first through an entity and then to it's children. That is particularly important when writing since we usually want the value of the parent to be up to date when we visit the children.
When using ordered_iter_for the order always comes from the first operator if there's more than one.
Although more than one component can be hierarchical in a scene and even on the same entity it's not very usual.
Rin's rin::graphics::Node for example, is a hierarchical component that represents a 3D hierarchy of objects where parents also transform their children. The global position, orientation, scale and transformation of an entity can be accessed from it's Node but their values can be outdated unless the system depends on Node as needs. Then it will run after the system that updates those values in a hierarchical fashion. As a user most of the time you won't need to access the hierarchy of nodes but the fact they are stored as a tree is what allows rin to easily and efficiently keep their global components updated.
Materials
Rin supports two types of materials, those used in the scene graph mode, which live in the rin::material module and those used in immediate mode which depend on the specific renderer so right now they are in rin::gl.
In the future these might be unified so the same materials can be used for both modes but the very different ways in which this two modes work makes that difficult to achieve without turning the gl::Renderer or any other future renderer into a much more complex part than it is right now.
Scene graph materials
Let's see first how to use the scene graph materials. Indeed we've used them already in the first app chapter. Let's review the basics.
First of all, in order to use a material we need to create it, usually through it's corresponding builder, with whatever attributes we want to use, then register it in the scene, which returns a handle to it and finally use that handle when creating models to assign them the material we just created. This is the way we created a material and assigned it to a model in the first app example:
// Create a cube geometry and register it in the scene so we can use it later.
// as a return value we get it's entity id
let cube = scene.register_mesh(rin::graphics::cube(1.));

// Create a new material of with a red color
let red_material = StandardMaterialBuilder::default()
    .color(RED)
    .build();

// Register the material and get a handle to it
let red_material = scene.register_material(
    "RedMaterial",
    red_material
);

// Create a model using the previously created material and geometry at the origin
scene.add_model("Cube")
    .geometry(cube)
    .material(red_material)
    .dynamic_transformation(pnt3!(0., 0.5, 0.))
    .add(Velocity(vec3(0.1, 0., 0.)))
    .build();
Most materials are used in more or less the same way but let's review the materials available by default in rin and how to create our own.
Standard material
This is probably the most common material, it behaves like a non-metallic or metallic material depending on it's metallic property value and it's parameters are:
base_color: Defines the color of the material